

This chime is made from a piece of collected, ocean driftwood, chains, my moms vintage silverware, beads, copper wire, a chandelier crystal and a vintage key.
Years ago my mom gave me her silverware. I wanted to create something with the silverware in her memory. She often had honored quest and would cook all day and the table setting had to be just right. White linen tablecloth with napkins, florals, and centerpieces in colors that matched the particular event we were celebrating. I have appreciation and positive memories from the experiences and fullness in my heart of gratitude to have had a fantastic mother.
List of material:
Vintage silverware
Power Drill and metal drill bit (I bought Stinger - Spyder - size 7/64”) diameter (Don’t forget to wear safety glasses - Don’t want the fine bits of silver in our eyes.
Scrap wood about 1 -2” thick to lay the silverware on while drilling holes in the top handle
Vintage buttons, copper wire in various gauge (I believe at used 18mm), my collection of antique keys, beads and chains and bric brac.
Chain from hobby store jewelry section (see images below)
Jump rings from craft store (see images below)
Chandelier crystals (vintage crystals I took off a yard sale chandelier)
Collage paper to glue to the back of the crystals.

Roll of Chain which we shortened with needle nose pliers to the length we wanted for each string of chime.

You will need needle nose pliers and a drip bit. I used the one pictures to make the opening in the handle of the silver ware. I laid the silverware on top of a scrap peice of wood about 1-2” think, made sure I had my safety glasses on, and drilled through the tops to create opening for attaching the silverware to the driftwood. I used a jump ring to attached the silverware to the chains.

Collected driftwood. Drilled through the driftwood at even intervals to create opening to run the chain through. I used a jump ring at the bottom to prevent it from falling through. see image 12

Collage paper. Lay the crystal over the paper and draw around the shape. Cut out the tracing and glue the side you want to show through the crystal onto the back with mod lodge or glue.

This is not exactly the shape that we used as you can see in the photo on the right. We painted the raw wood piece to match the colors of the theme within our chimes. You can pick these up at hobby stores. We also glued a rhinestone into the center to add bling.
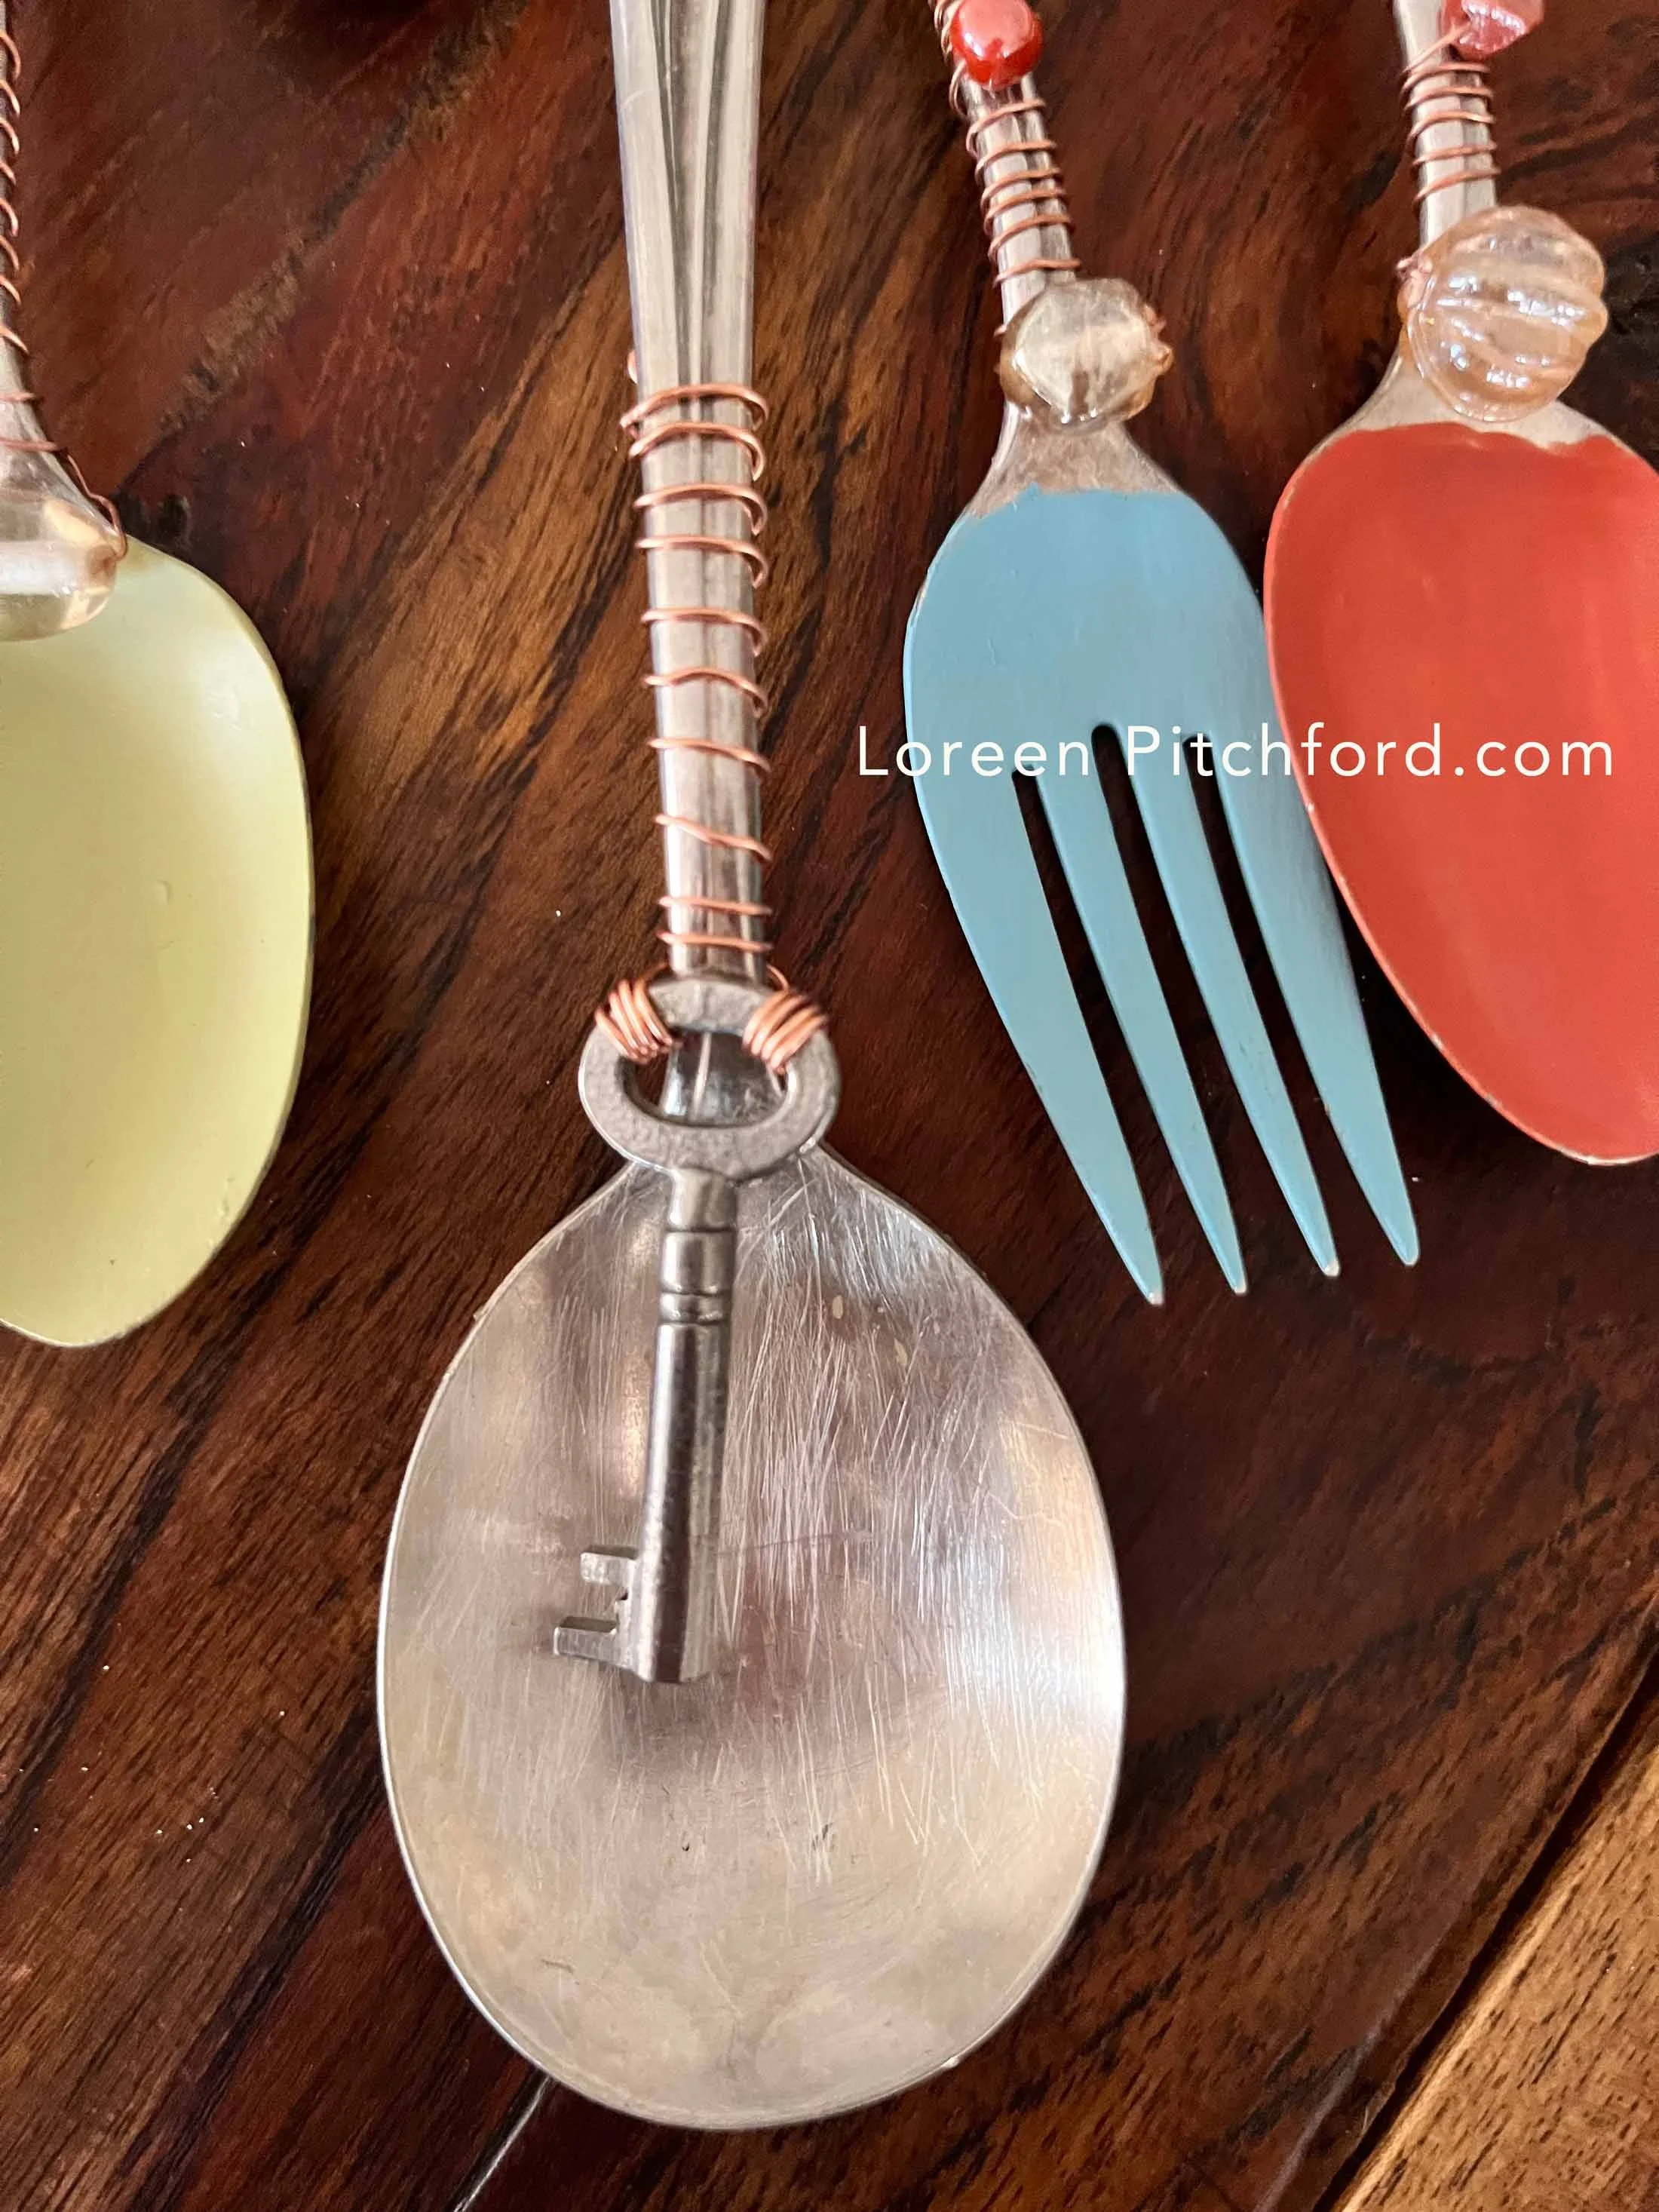
Closeup showing that the larger spoon which was sanded with fine 100 grit sandpaper to raise the shine a bit and stand out behind the key. The beads where chosen to coordinate with the painted silverware.


Jump Rings used to connect the silverware to the chains and also at the top of the chain to prevent the chain from sliding through the drilled hole in the driftwood. We measure the driftwood peice and maked evenly spaced areas we drilled through to create opening for the chain to slide through. On each end we used a longer length of chain, fed through the driftwood and would be used for hanging. Then to prevent the chain from just sliding through we attached a jump ring snuggly to the link at the bottom near the drift wood. See photo 12.

Variety of bead from broken necklaces, old bracelets, vintage necklace - etc can be used to wire to the chains or introduce to the wiring along the silverware. Lots of potential designs so be creative.

God and Country Themed.

Dipped the silverware into pots of paint, knocked the large accumulation off and hung to drip dry. Could also paint them with a brush.

I used a finer gauge wire than shown here (perhaps 18mm gage) and evenly twisted it around the silverware added beads at varying intervals. I double wrapped at the beginning to secure it before continuing up the stem of the silverware.
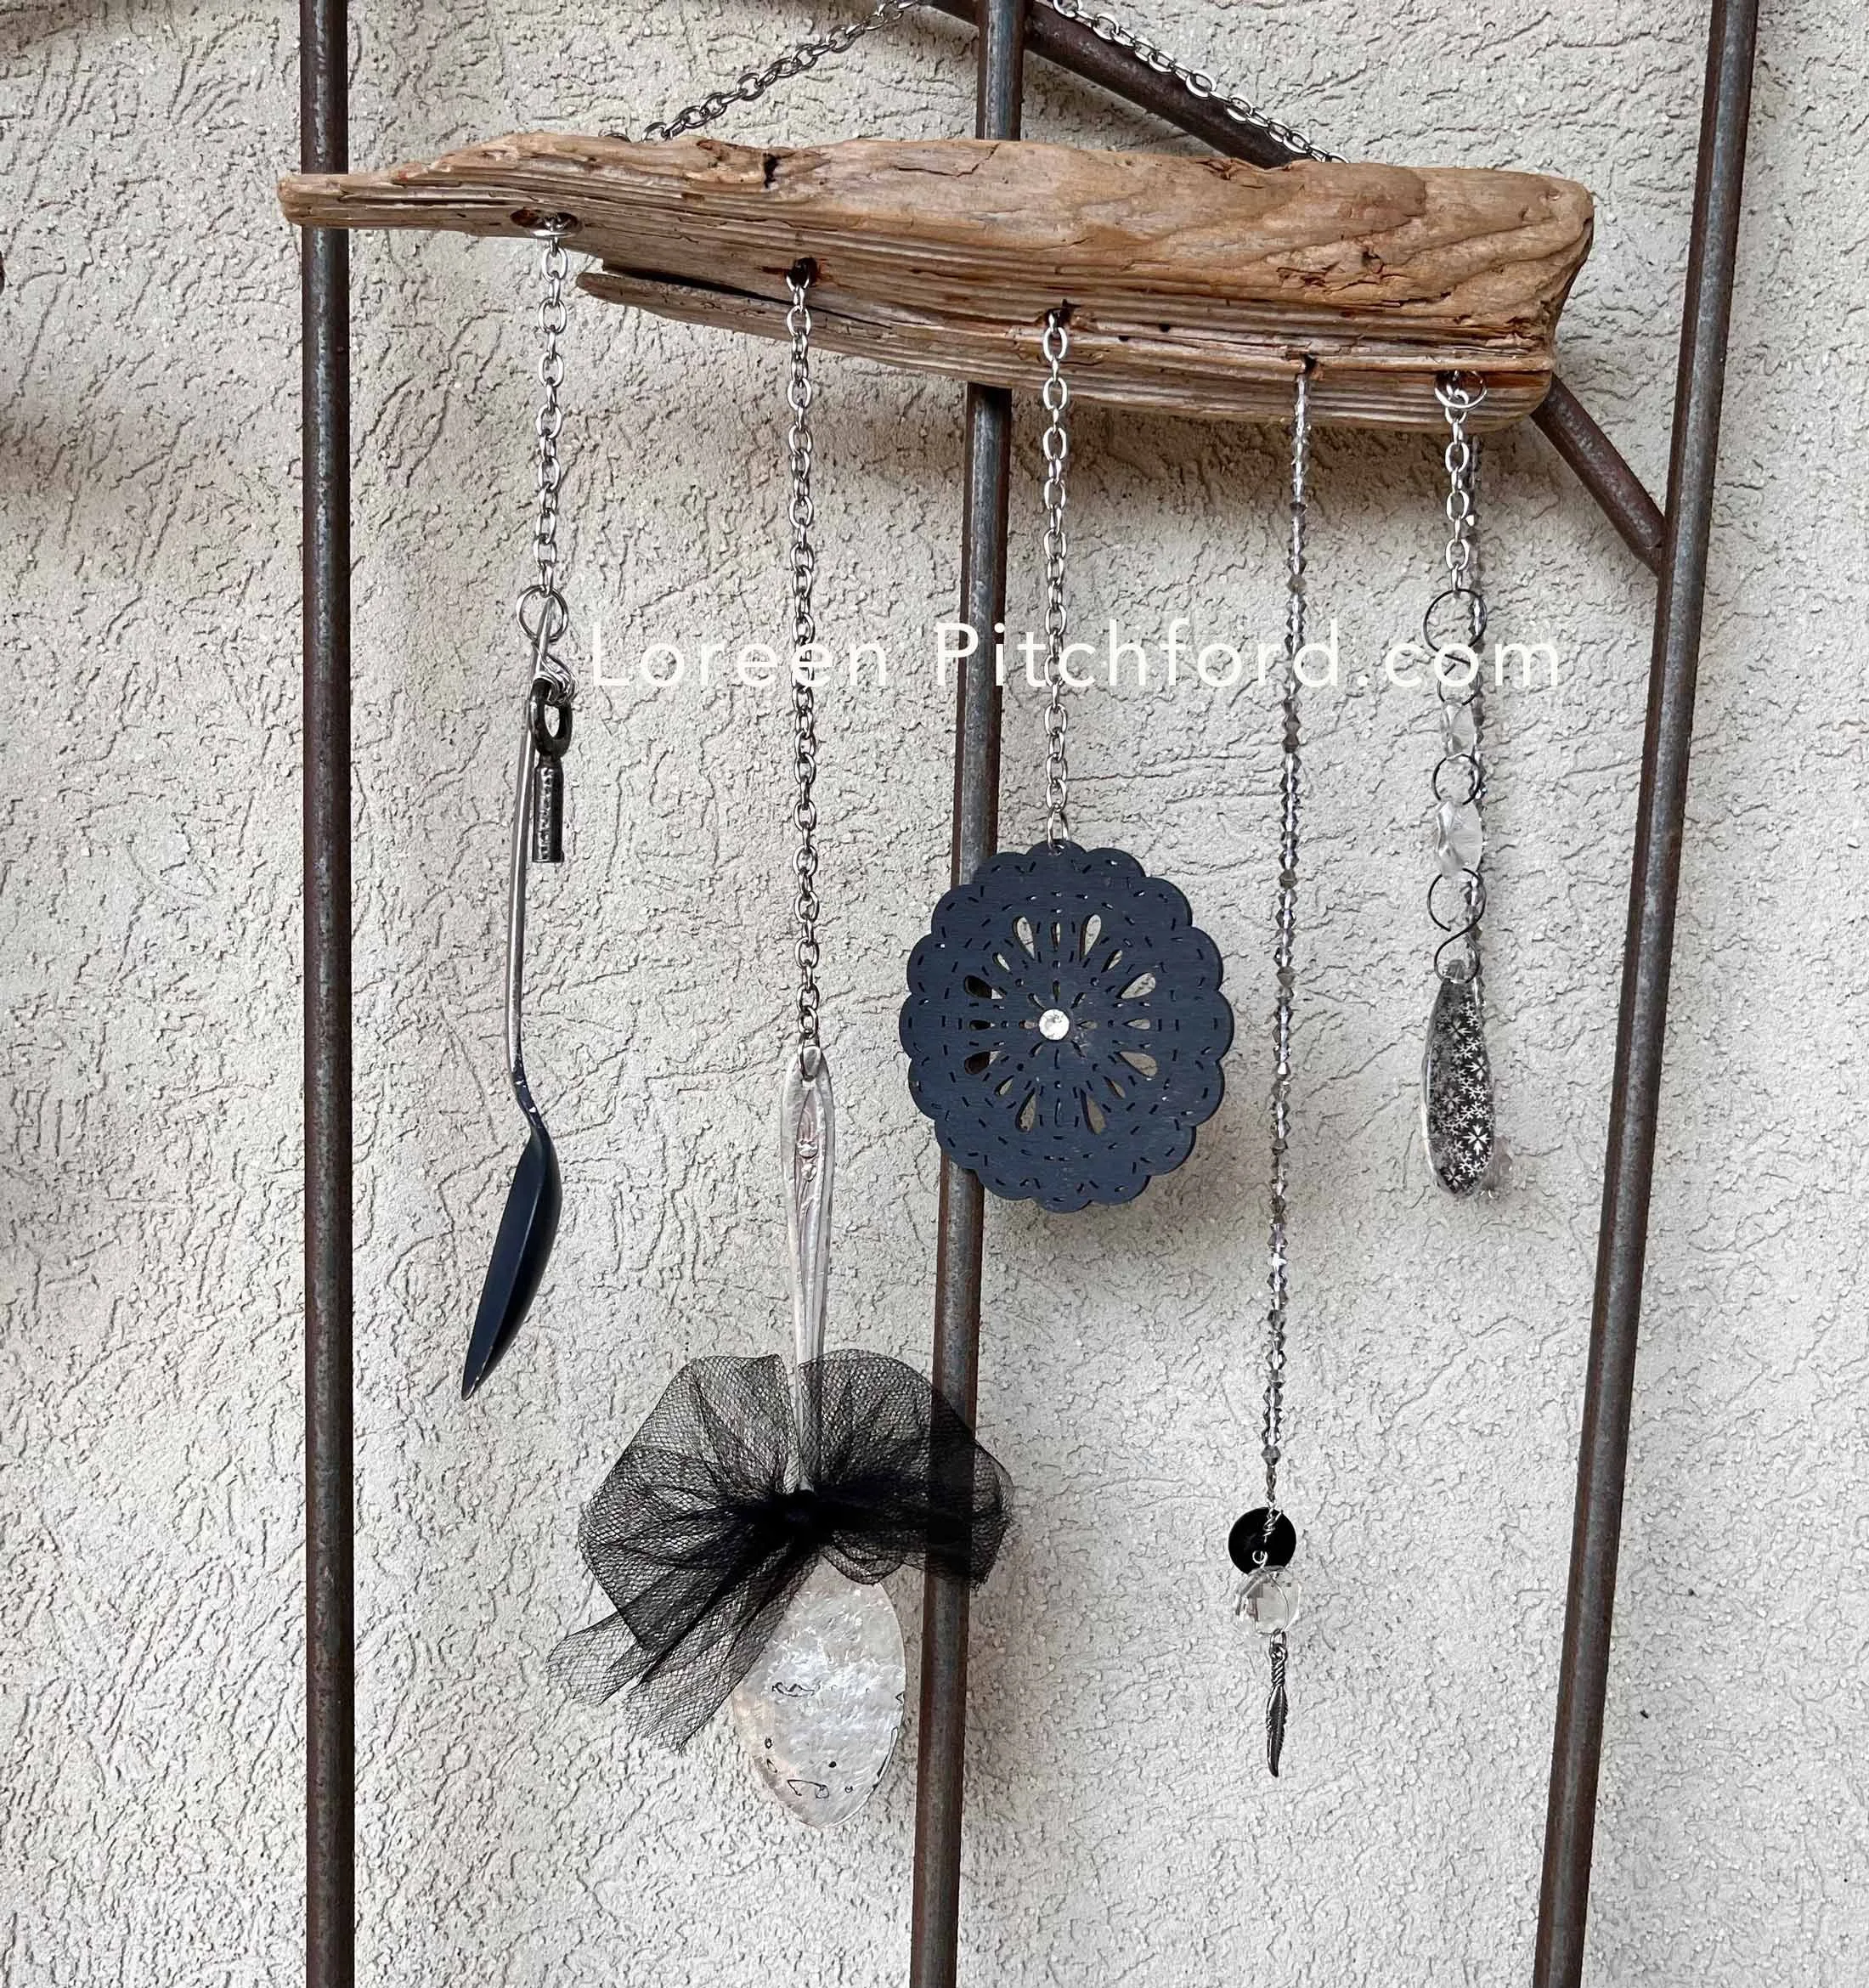
We glued a small rhinestone in the center of this wood finding. The spoon with the tulle ribbon was hammered flat to give it a little more shine and texture. Also attached a vintage key and a chandelier crystal that was treated with the collage paper glued to the back. The long crystal beaded piece came from a old necklace and a vintage button and silver finding added to the bottom to finish it off.

Simple design with the wire beading around the silverware with beads added for bling and dimension. Here’s where the key was introduced by wiring it at the base of the largest spoon.

They make a sweet sound in the wind!
Hope you like the small tutorial and the photo instructions!